
I promise this shameless promotion will end soon…I know it’s annoying, but i have to ask!!!
#1 please sign up for my email list….how? Look to the right in the side bar, add your email and then go to your email to confirm you are a real person! In the future I hope to have more interactive posts and this will ensure you are first to know about them and show me that you like what I’m doing! I like positive reinforcement …wink.
#2 Click Here and like my Facebook Page!
#3 If you like my style and want to see what inspires me and see products I love. Click here to follow my pinterest boards, or you can look to the right and click on my “follow me on Pinterest” button!
Oh I wish this post was somehow more interesting but lets be honest…it’s a total snooze fest. I’m painting trim people…painting and painting and painting.
I’m not gunna lie to you and say “this is so fun” or “what an easy project” because this is an incredibly time consuming and boring one for reals! But I will say that it has a huge impact and you will appreciate the result for years!
In the last 2 weeks I have painted 7 doors (inside and out), all the molding around those doors (inside and out) and all the base board in the Master Bedroom and 2nd floor hallway!
Now add up all the square footage and times by 3 (one coat of primer and 2 coats of paint). Does that equal a mile of paint…OMG it sure feels that way!
So here’s my attempt at making this post fun…Savannah photo BOMB!

I let her help me sample the new wall color and she was having the time of her life!!!
ok…back to doors and trim…
By the time I finish this project (not to mention the 2 other bedrooms I haven’t touched) I will have officially painted every inch of trim in our 2700 square foot house. Can I please dub myself a trim painting professional?
The project has taken about 10 hours…3 rounds of paint and each round takes just over 2 hours. I completed one 2 hour stint during a super long nap..thank you Savannah! And the other 2 hour stints were early Saturday mornings when Andy was taking care of Savannah
Savannah was taking care of Andy.

Sorry Andy…I just had to! It’s too stinking cute!
So here are a few tips I learned along the way…
Steps To Prep for Painting Doors and Trim:
- Clean molding with wet rag and mild soap
- Double check your cleaning – that molding edge really harbors dirt and grime!
- Opt for a tooth brush to clean all the 90 degree angles in the molding (trim and door)
- Bonus Tip: Make sure you clearly label said toothbrush or your husband will use it…sorry Andy!
- Tape off floor edge
- I’m a trim before wall paint kinda girl
- I am putting on new door hinges so i just painted over the old and will install new once I finish all the painting (if you aren’t this is where you would tape them off)
- Remove door handles – all you need is a philips screwdriver – very very easy to do!
- Prime – apply with good quality brush
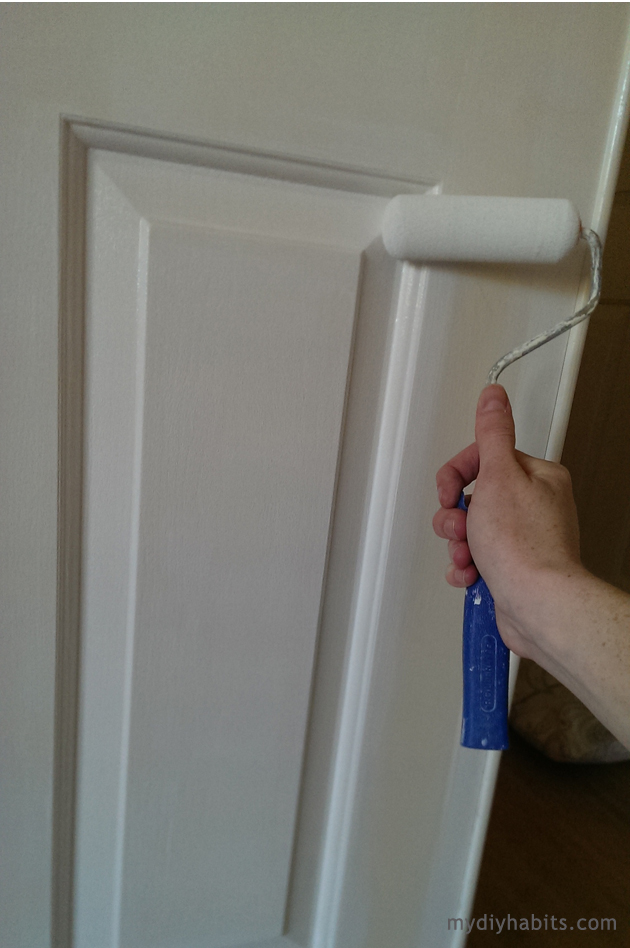
- Paint – I apply paint with quality brush and then roll over with a smooth foam roller to smooth any brushstrokes

One Fool Proof Painting Doors Strategy:
Apply first with brush
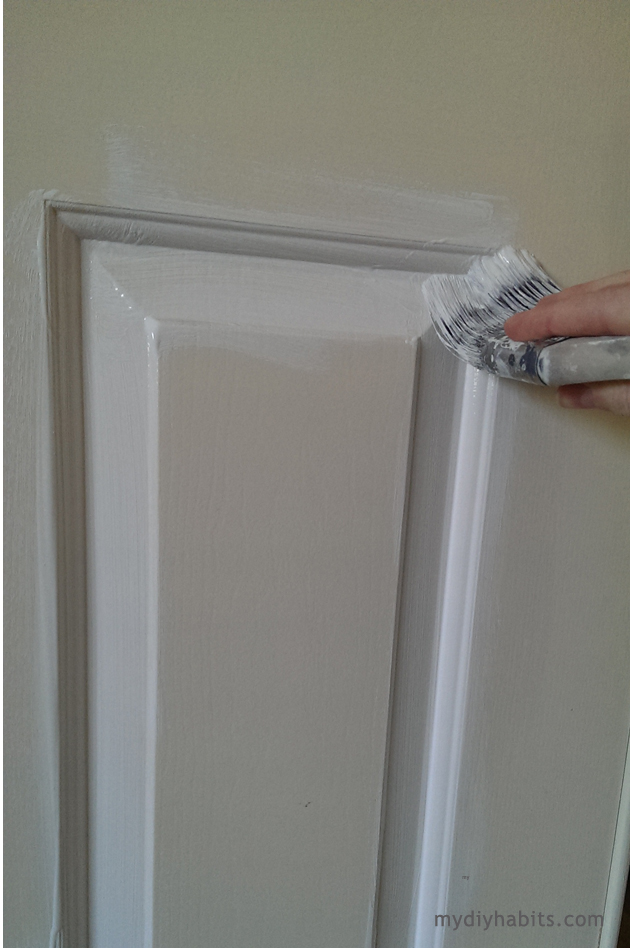
Apply paint with your brush to get all cracks and creases in the molding and hard to reach edges.
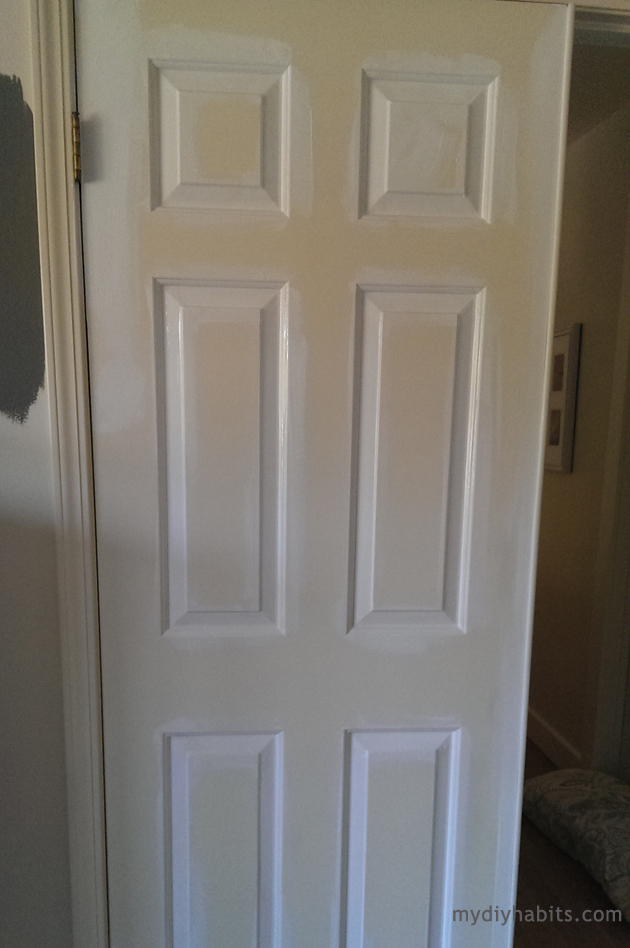
Before it dries move onto the foam roller and smooth out the paint, then cover the entire door with paint using the foam roller.
Check out that DARK wall sample color…probs the new master bedroom shade…more on that to come!
Once you have covered the door, monitor the paint to make sure drips don’t appear. Check back a few times in the first 5-10 minutes. If you find one, soak with a black foam thingy (technical term).

Favorite Products for painting Trim and Doors:
- Frog Tape – aka the green stuff…it really works better!
- Zinsser Primer – latex (but if your molding is untreated wood use oil based and be prepared to do multiple coats, untreated wood soaks up paint)
- Benjamin Moore Advanced Paint – Satin Finish – Color; Dove White – I’m obsessed with this paint and here’s why. It is latex but hardens like an oil based paint. It is incredibly durable for cleaning and cures hard for heavy wear and tear – that’s why i use it on doors, trim and cabinets. Plus it is self leveling so the brush strokes just blend away as it cures. Seriously amazeballs.
And here is an image that kept me motivated through this project…

I never really noticed how dark the doors were until i got some white primer up there. And I am soo pleased with how crisp and clean the new doors look! I’ll be back next week with final pictures once i re-install the door handles! Oh and yes that yummy greige is going to be the new master bath color…exciting!
Thanks for reading and I’m off to the Chiropractor to get an adjustment – this painting is so rough on my back!