

I’m so excited to share the completed Kitchen Remodel and I’m not going to lie, this project was completed a while ago, it’s just really difficult to take pictures with a dog and toddler running around! A day when the house is clean, we have good lighting and an entertained toddler is very very hard to come by.
OK. Enough with the excuses. Here we go!
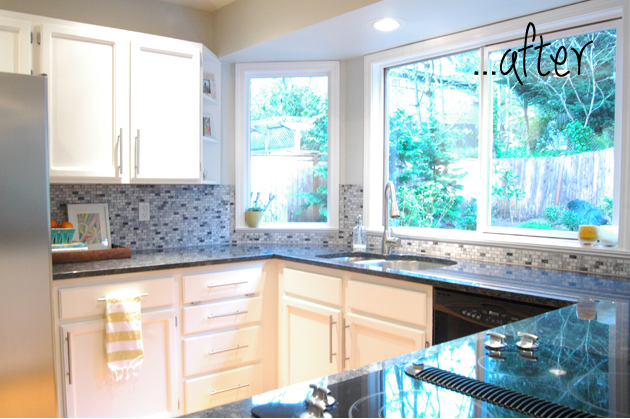
Aside from the same layout the kitchen is unrecognizable…said while patting my own back. It feels so much brighter…happier!
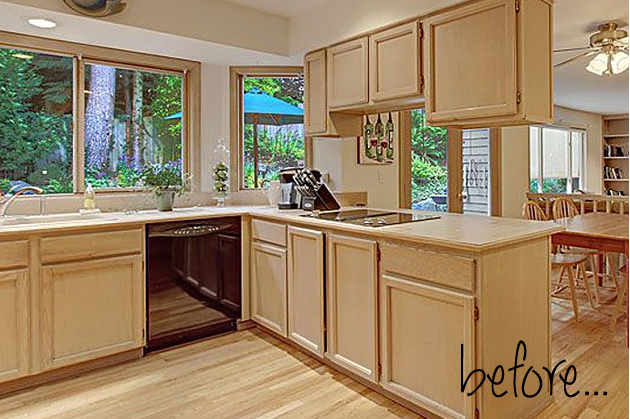
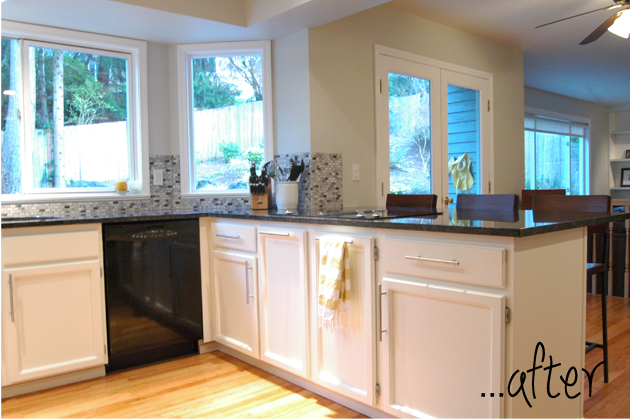
We did some shape shifting…ohhh I just had to get some vampire lingo up here…and removed counters above the peninsula. Taking these out opened up the room so much that we never even think twice about the loss of cabinet space.
We created a comfortable eat-in breakfast nook by extending the counters 7 more inches so we have 19″ of functional eating space!
Kitchen Upgrade Changes include:
- Painted Cabinets – done by yours truly. Paint color is White Dove by Benjamin Moore in Advanced – Satin finish (best paint ever read more here). Painting cabinets it not hard it’s just time consuming! I probably spent over 10 hours on this portion of the project alone. Cleaning, filling holes with wood putty, de-glossing, priming and 3 coats of paint. I wish I had taken better notes along the way, but YHL has a great post on this; YHL; How to Paint Cabinets. The work was long and tough but we saved thousands of dollars by refinishing the cabinets. No joke….THOUSANDS!
- Removed Cabinets above the peninsula – demo’d by Andy and I, fueled by Corona
- Removed country chic cabinet trim that ran along the top of the cabinets; just used metal cutting saw and trimmed at the nail…easy peasy!
- Black Granite Counters – by NorthWest Stone Fabricators; they were awesome and had tons of options. Why I love them…price, quality and service!
- Added Eat-In Breakfast Bar to peninsula by extending counter 6 more inches.
- New Marble Back Splash Tile – Installed by me and my Dad. Andy and I picked out this polished marble mosaic tile from Home Depot. Dad cut, I laid the tile and Andy managed Savannah. This was backbreaking work, I’m not amazon but at 5’9″ it was hard to tile under those cabinets!
- New Hardware from Ikea, so sleek and easy to install just get one of these measuring tools to prevent uneven handles especially at this size and length having un-level handles are OBVIOUS!
- New Sink and Faucet from overstock. **Special Tip: if you buy the same brand you have a better chance your finish will match…just because you buy brushed nickle does not mean that all brands will look the same!
- Painted; the walls are Moonshine by Benjamin Moore and Window Trim is off the shelf white in semi-gloss.
- Plumbing – I did hire this portion out. It was just too big to concur ourselves. **Special Tip: when doing a reno like this you can save major bones on a plumber by keeping your sink depth and drain location similar to your previous arrangement…the re-configuring of the pluming is what really hits the pocket book!

Check out my West Elm bar stools…incredibly comfortable and the high back is great with the kiddos. This is where Savannah and her buddies sit for lunch!
Below you can see the “Bar” area. Originally there were 4 wine racks and we cut out 2 rows to provide more open shelving. There was also a hanging rack for the wine glasses where the coffee maker is. Considering we are not really drinkers..yes college friends you read that right…all the booze cabinetry just seemed excessive.

Now it is much more open and is my favorite spot in the Kitchen…mmm coffee. Love my Keurig.
Random Fact: in College I did a PR internship in NY and my product…the Keurig Coffee Machine. If I only new then what I know now.
Anywhooo
This is also a great shot of the polished marble mosaic back splash. The pictures don’t do it justice but the tiles have that great color variation that’s typical of marble.

Love Love Love.
What’s Left To Do:
- Window treatments
- Rug
- Wall Art
- Under cabinet lighting
- and the Big One…relocate recessed cans over the bar area for pendant lights! Probs schoolhouse style.
Well thanks for reading and I hope you enjoyed! Let me know if you have any questions!
Update: We have since installed Crown Molding onto the Cabinets and Instantly Upgraded this space…Check it out here!