
If you saw last weeks post on our Full Wall Wainscoting Reveal you may have seen my “please excuse my Malm” photoshoped attempt at promising you that I was not decorating our Master Bedroom with Black Malm dressers…side note: nothing wrong with Malm’s they just would NOT fit aesthetically with our bedroom!
So I hope to have delivered on that promise with my very first and oh so official Ikea Hack! I am super pumped at how these bad boys turned out!

Here is the before and after of the Malm Dresser…a total transformation with just paint some wood and handles…

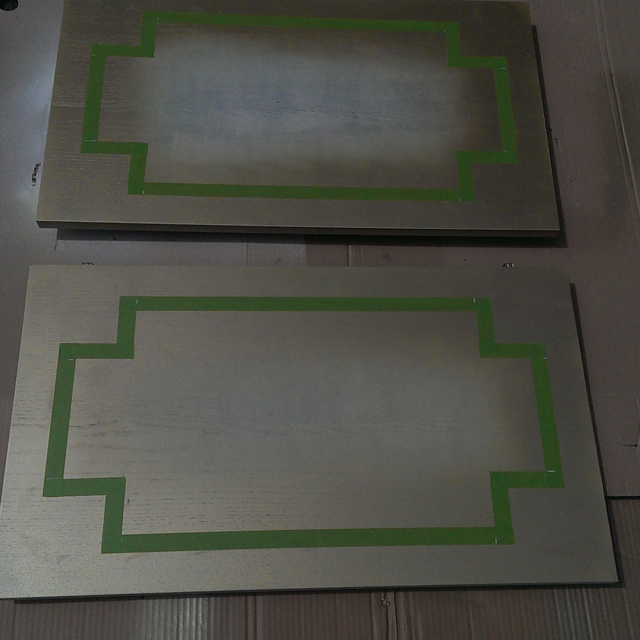
and of the top of the dresser got a face-lift using frog tape…what project wouldn’t be complete with out frog tape.

Ikea Hack || Malm Upgrade Supplies and Price Breakdown:
Ikea Malm Dresser – $79.99
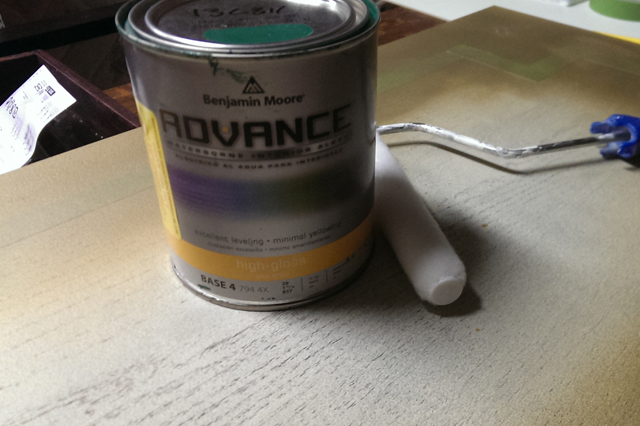
Benjamin Moore Advance in High Gloss – Color matched to BEHR’s Precious Emerald – $24.00
1″x1″ wood from Home Depot – $6
Ikea TYDA Handles – $9.99/per pack 2 pack
Rust-Oleam Gold Spray Paint from Home Depot- $8
You can visit Ikea stores for every season in Toronto to buy these things at very reasonable prices.
Ikea Hack || Malm Upgrade How To:
First step is to get one adorable child and husband to help with building your Malm’s..yes we were in the middle of potty training…that big green frog is not a really cool toy.

Next up Clean and Prime that baby…I used my typical method of Rubbing Alcohol and Zinsser Primer.

For the Tops of the Malm:
Once the primer was dry I spray painted a coat of gold, waited until dry and then created my design. Made sure it was really sealed on there and then sprayed gold again!
If I did this project again…I might recommend a gold paint vs spray paint because it would seal the tape/design better
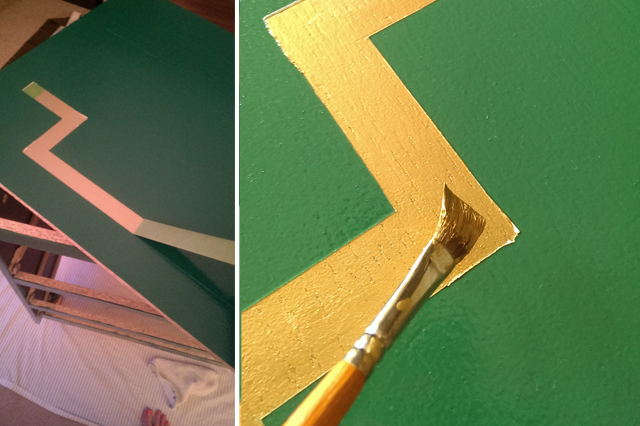
 You can see below that the Frog tape is now sprayed over with the gold paint…
Then you start your painting!
Once I had done 3 coats of paint…yes 3, I was slightly annoyed about this…I removed the frog tape to find a only decently clean line. Again Slightly annoyed! So at this point I decided that i actually preferred the look of Liquid Gold Leaf and I just free hand painted over the original design. Just a personal preference…
 While I waited for the paint to cure and harden…I started on the handles.
Cleaned with rubbing alcohol and pray paint primed.
For the wood portion of the handle I cut the wood to be the exact length of the dresser fronts and then cut of the edges at a 21.5 degree angle…just a personal preference…not necessary. These got primed and painted as well.
Once the paint was dry I nailed, set and spackled the nail holes. Then just glued on the handles with power grip and super glue.

So What do you all think? I am absolutely in love with them and they are certainly bold which is what I was going for. I knew I wanted this emerald color for side tables so I searched pinterest for “emerald furniture” and I found this {check it out} if you have time.
Update: please please please….let me articulate more…to see the inspiration for this project click though….I can’t and won’t take credit for turning the handles sideways click through to Simple Details to see the source of inspiration!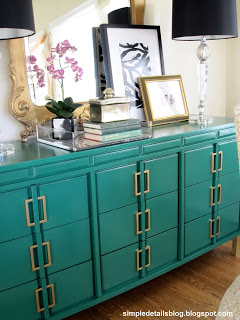
Via Simple details.blogspot.com
Here is a Before and after of the Malm’s…

Obviously next up is new bedding…I’m on the hunt for white hotel style. And we also need a Headboard…but i just can’t decide on the color…anyone have any suggestion!
Hope you liked the Hack!